OneCloud
Hardware
Required: OneCloud device, USB HDMI capture card, USB dual-headed cable
Optional: TF card (storage expansion), TTL-to-USB adapter (debugging)
Integrated Image Deployment
Image types
- USB Burning (suffix
burn): for Amlogic USB Burning Tool. Use v2.1.3 or earlier - USB drive/SD card boot image: write directly to a USB drive or SD card
Video tutorial
See Bilibili: 夏秋BH6RRB.
Notes
During shorting for flashing, you can release after the tool recognizes the device (around 1%). Images below courtesy of 蓝蓝 from the OneCloud community.
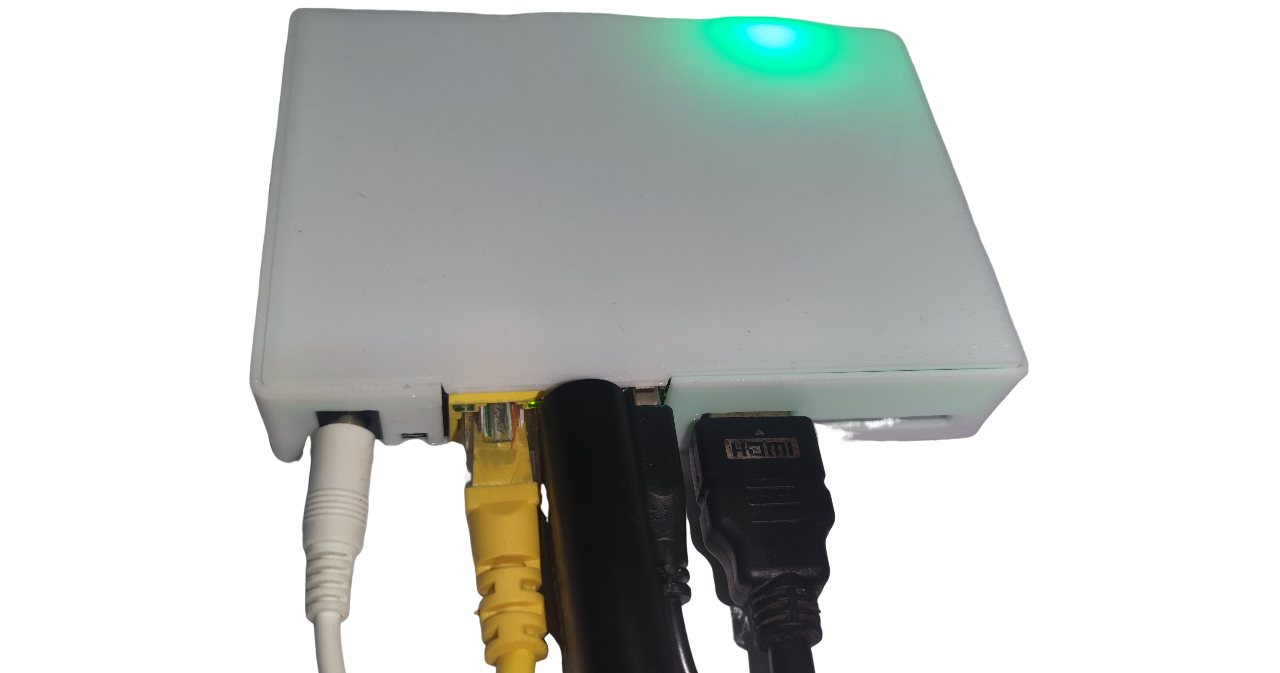
After flashing the direct-write image, networking defaults to DHCP with hostname onecloud. The front-panel LED turns from red to green during boot. Access the device in your browser via its IP.
For subsequent flashing, hold the reset button while powering on to enter flash mode (no need to short again).
Usage
Connections
- Plug the USB HDMI capture card into the USB port near the Ethernet jack; connect HDMI from target to capture card
- Plug the dual-headed USB cable into the USB port next to the HDMI port; connect the other end to the target
- Ensure cables are secure; connect power and network
Reminder
Some low-power targets may draw power via the dual-headed USB cable and enter a bad state before external power is applied. If so, cut the red 5V wire inside the dual-headed USB cable.
SSH
Armbian enables SSH by default. Initial credentials: root/1234. Change the default password immediately.
Warning
Do not run apt upgrade to upgrade the kernel/DTB. It may break OTG.
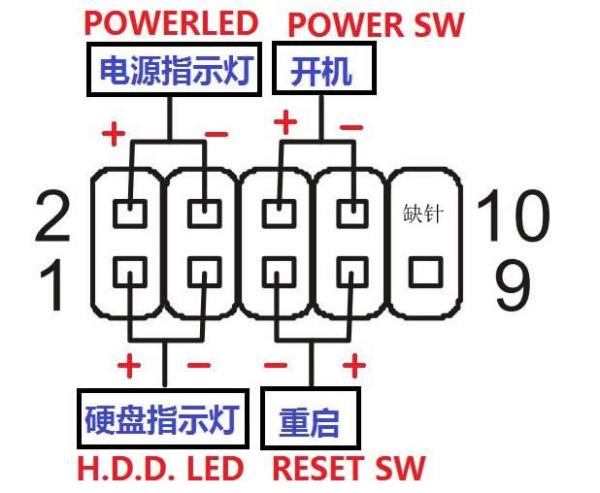
ATX Power
To use ATX power control, connect the power switch cable.


