OneCloud Kit Guide
Note
This page documents an early One-KVM kit sold by the author and is archived. Content is no longer updated.
Hardware
Connections
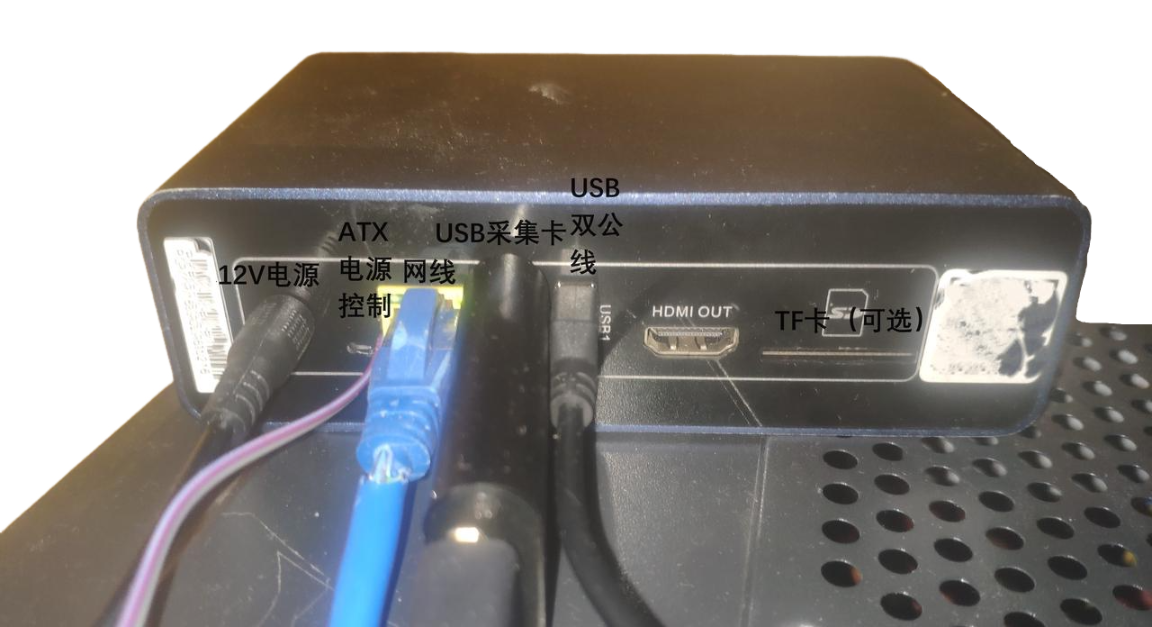
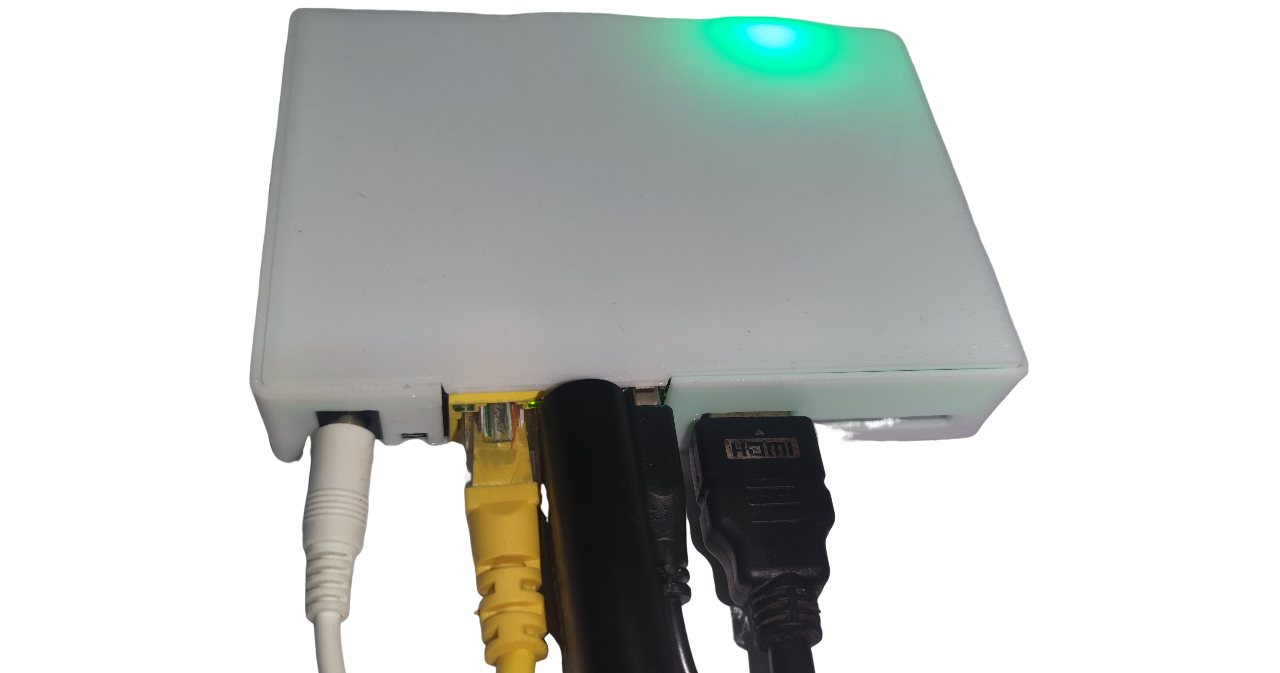
Insert the USB HDMI capture card into the USB port near the Ethernet jack. Connect HDMI to the capture card, and the dual-headed USB cable to the USB port next to HDMI. Plug in Ethernet and power.
On the target machine, connect HDMI and the dual-headed USB cable to the corresponding ports.
Reminder
Reversing USB connections will break PiKVM remote control features.
Tip
Some low-power targets may draw power via the dual-headed USB cable and enter a bad state before external power is applied. If so, cut the red 5V wire inside the dual-headed USB cable.
Tip
Initial WEB/VNC: admin/admin. root is set by users; if unset, try 1234.
ssh: 22
web: 80, 443
vnc: 5900
janus ws (default off): 5009
Tip
Troubleshooting:
No Signal — check cabling;
Black screen or color bars — verify HDMI input;<br+ BIOS abnormal — enable CSM in BIOS;
Mouse offset/range — switch to relative mode in the top-right menu;
Intermittent black screen after refresh — try Firefox;
If unresolved, reboot OneCloud; if still broken, open an issue or ask in the group.
MSD
Mass Storage Drive allows remote uploads and image mounting. CD-ROM images are limited to 2.2G by Linux; FLASH has no limit.
Warning
Do not use Disconnect when the dual-headed USB cable is unplugged from the target or the target is powered off, or the kernel will continually log errors and MSD will remain unavailable until OTG recovers.
ATX Power
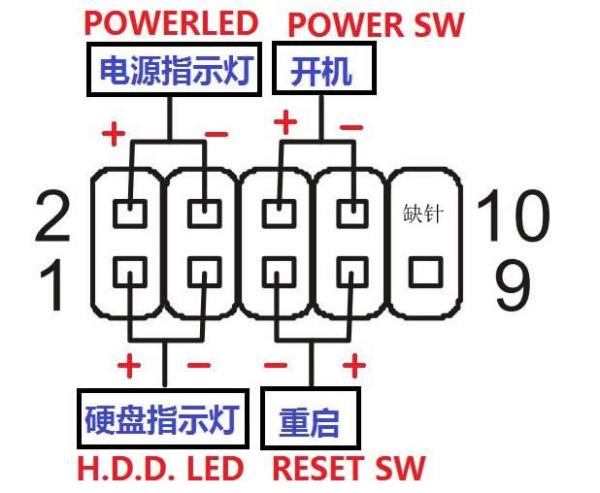
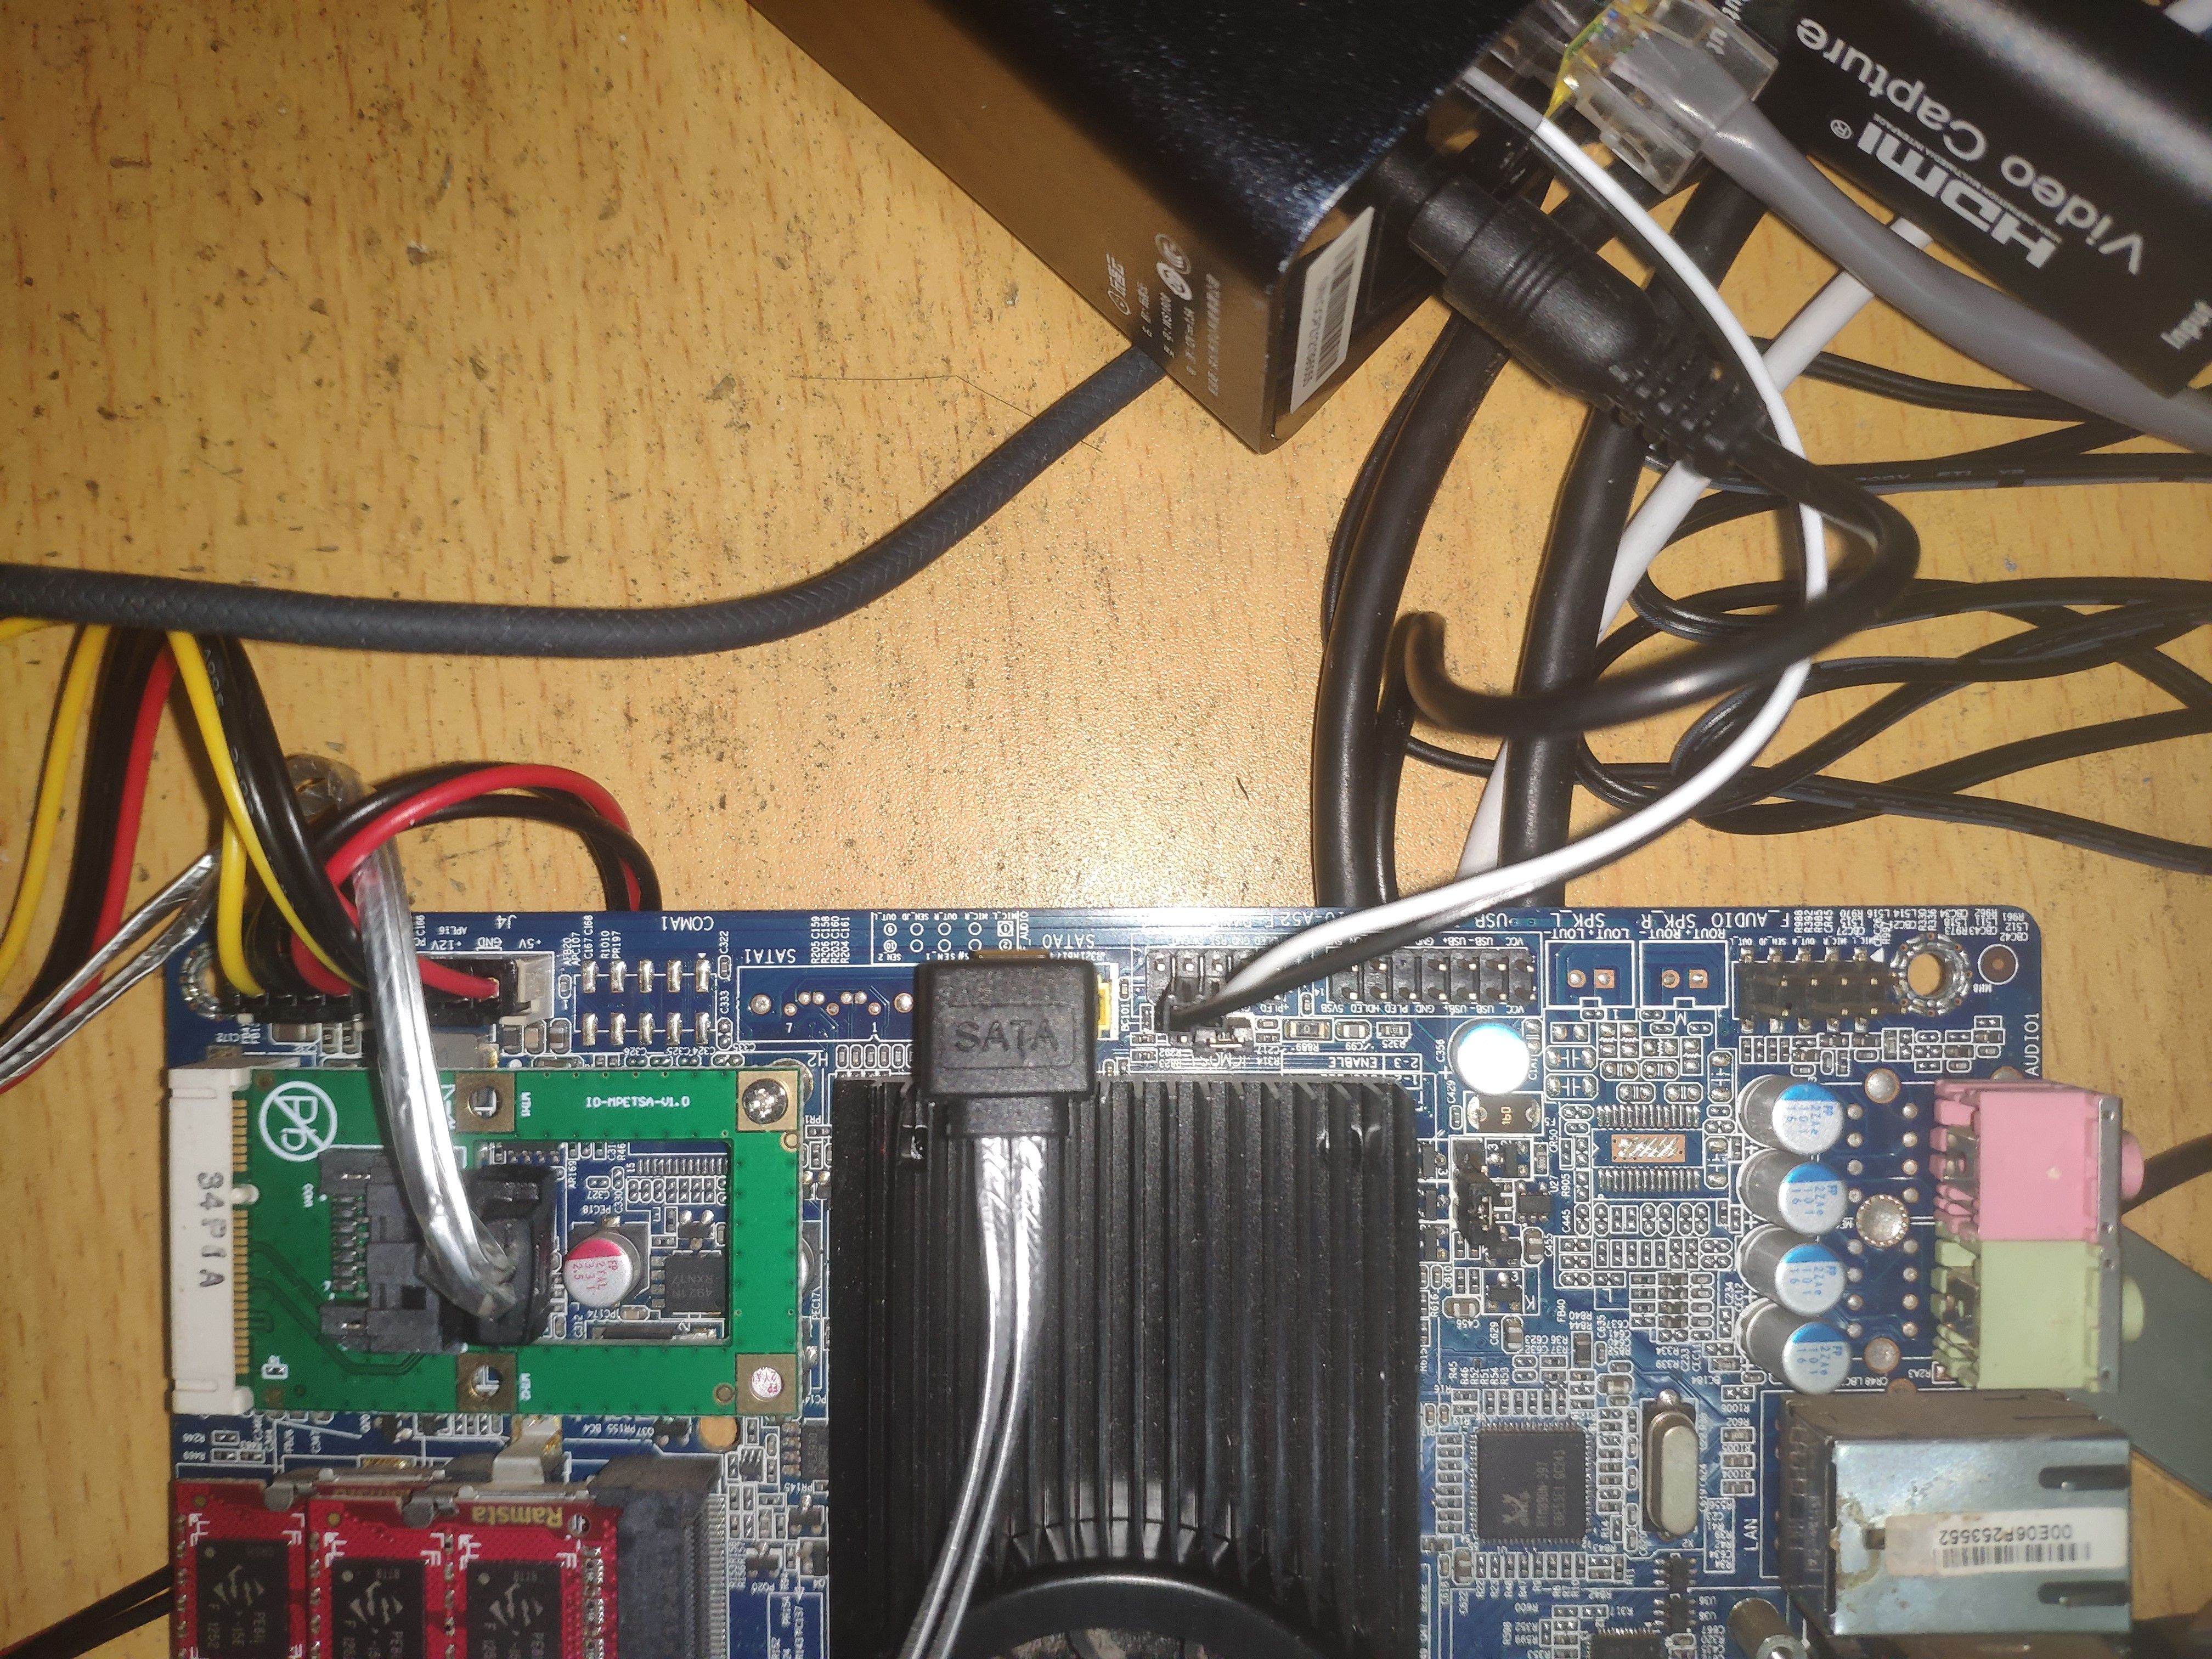
To use ATX power control, connect the power switch cable (dark wire to pin 9 GND, light wire to power pin; color pairs like black/white, brown/red, orange/yellow represent negative/positive). Extension cables are not color-coded.


